Search This Blog

Friday, January 10, 2020

Cannot Reinstall Windows 7’s iTune

10 January 2020

Important Note:  Always backup the Registry using "System Restore" before meddling around with the PC.

One might come across this problem. iTune stopped working and re-installation stuck with this error message:

After that, no matter what we do, we are always stuck with this error message. Trying to do the following as recommended by many will not work as well:

1. Uuninstalling iTune or Bonjour Services or deleting the iTune folder from the PC or LapTop;

2. Re-istalling the Windows Installer or update to the latest version;

3. Doing “System Restore” without any success;

4. Repairing the Operating System using System Inastallation Disk;

5. Registering and unregistering Windows Installer, msiexe.exe;

6. Uninstalling all other Apple device including Bonjour;

7. Playing around with the Registry keys by removing iTune and Apple related products.

At the stage of almost trying to recover the Windows 7 installation, this solution popped up.

What that Solution?

It is actually a solution offered by Microsoft.   It said it will fix problems that block programs from being installed or removed.  Here is the program to download.

Just follow the instructions given by the program. The program is safe to use. It will helps one to repair program installation and uninstallation issues. It will also fix corrupted registry keys.

Should the above fix does not solve the issue,  try to restore the PC back to its original state using "System Restore". 

What could be Wrong?

There was no specific explanation about what was preventing iTune from re-installation. Microsoft only said that the program that fix such issues will fix the following issues
  • Corrupted registry keys on 64-bit operating systems that control the update data;
  • Prevented new programs from being installed;
  • Prevented existing programs from being completely uninstalled or updated;
  • Blocked one from uninstalling a program using "Programs and Features" in Control Panel.

What need to do after the fix

Uninstall all Apple Software, reinstall iTunes or iCloud for Windows.

Sunday, January 5, 2020

The Missing IPhone Folder in PC's Explorer


5 January 2020

The IPhone folder is always there in the PC’s Explorer when I plug the IPhone using the lightning cable. The other day, the folder disappeared suddenly. It disappeared when I was trying to change the default program for IPhone’s picture JPG. This led me to a witch hunt thinking there was something wrong the PC.

What Happened?

When the folder was missing, I unplugged and replugged the IPhone cable many times. The PC would always acknowledged the connection with a sound. The only problem was there was no IPhone folder found in the Explorer’s screen.


The Symptom

The following were the observations:

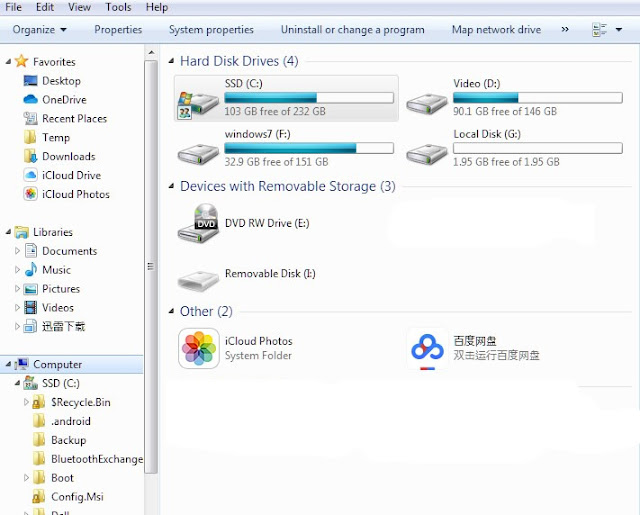
1. There was no “Portable Devices” folder shown up in the PC’s Device Manager

 
2. While unplugging the IPhone, the "Portable Devices" would pop up momentary. It would show that “Apple IPhone” was not connected. Soon after, the folder would disappear

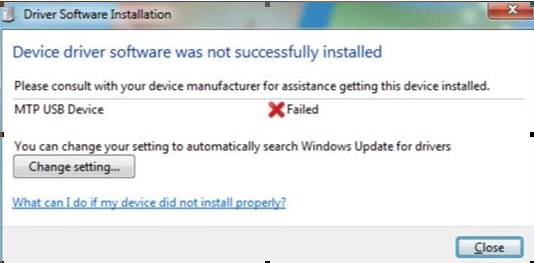
3. Deleting the “Apple IPhone” before it disappeared would change it to “MTP USB Device”. Deleting "MTP USB Device” again would need one to reinstall this driver at each IPhone plug-in. But, it would always fail to install each time.


What was Suspected?  What was done?

The immediate reaction was to assume that something was wrong with the PC. The drivers or the Operating System might have been corrupted. There were many such incidents reported before.

Tried almost every “tricks” found in the Net. These include uninstalling the iTune and Apple Mobil Device software. Also carried out Registry keys modifications, MTP and Apple USB drivers reinstallation. This witch hunts went for 2 days. None of the “Tricks” worked.

There was even a thought coming up to re-install the Operation System or to do a System Restore.

How It was Solved?

Thinking out of the box, I connected my old OPPO Android Phone to try out if it was the PC's fault. To my surprise, this old OPPO Android Phone was connected to the PC without any hitch. Finally, a simple “Slide to Power Off” and then “Power on” on the IPhone solved the  problem.


Take Aways

1. Like any human dispute, never assume that the 1st party (in this case the PC) is at fault. This was despite the fault occurred when I was fiddling around with the PC;

2. Always find a 3rd party (in this case the OPPO Android Phone) to confirm whose is at fault;

3. Last but the lest, never depend only on “gossips” from the Net to get your problem solve. Always think out of the box.


Thursday, January 2, 2020

Making an I/O Back Plate for PC MotherBoard


2 January 2020

For those who swap their PC’s motherboards will find their motherboards sometimes come without a I/O Back Plate. They might have bought these motherboards from the “Market Place” or Carousel. They might find an old motherboard  from their junk storage. Trying to get a similar back plate will not only be costly but also not easy. The solution is to make one.

What you will need?

1. A top cover of a clear plastic box that measures 180x180, enough to make 2 plates

2. A sharp scissor

3. A fine point marker pen and Scotch tape

4. A ruler

5. A sharp pen knife or high speed drill such as Dremel drill


Step by Step

1. Cut out a piece plastic sheet, measuring 10 mm larger than the I/O window. For example, if the I/O windows is 150 x 50 mm, cut a plastic sheet of about 170 x 70 mm;


2. Mount the motherboard inside the PC case together with the clear plastic sheet. Making sure the hole of the motherboard is about in line with the mounting screws;   Fix the plastic sheet in position using the Scotch tape.


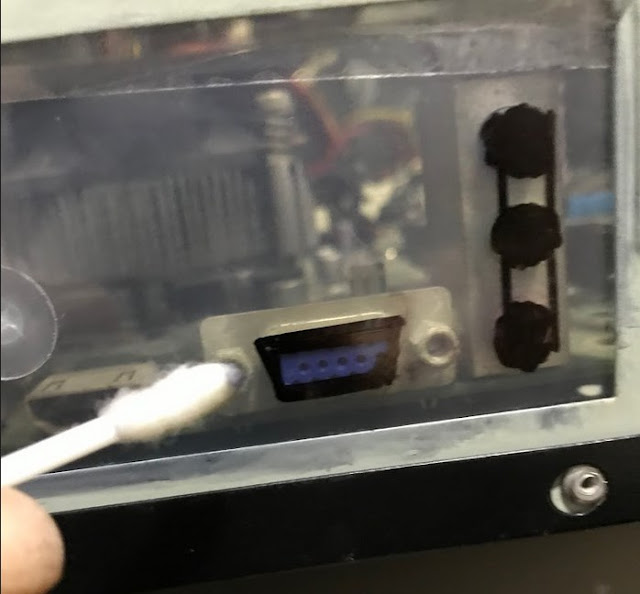
3. Mark out the holes of the various ports using the ruler and the marker as the tools. Double check the positions of each hole marked; use cotton stick with thinner to clean up the edges and mistakes


4. Dismount the plastic sheet and cut the hole out using the penknife or the Dremel drill

5. Mount the plastic sheet to the motherboard to check if the holes are in line. If needed be, cut another similar plastic sheet with holes correctly adjusted. One can also make use of paper to cut a temple first to match the holes of the port. This will save having to cut another plastic sheet.

6. Roughen up the inner surface with sand paper and pray paint the plastic sheet with beautiful colour to decorate the plastic sheet  if necessary.

Simple and Easy Way To Backup Photos, Movies and Documents from handphones

 2 December 2023 In the past,  we used iTunes when we wanted to transfer or backup our photos,  movies, and documents from iPhones or Androi...