This has been the most difficult part of the installation. HP has very few XP drivers to help. Download and install these drivers first, then One would have to find the rest of the drivers from other sites. To facilitate installation of drivers, I have compiled a set of relevant drivers (updated 22 Dec 07) (44 MB) for TX1209. The drivers for TX1222 is found here(43 MB).
As these files are in compact format with .info files, Device Manager can be used to search for these drivers. Download the file and unzip or unrar into a folder or a new disk, then follow the following step by step instructions:
1. If one has already installed the XP Service Pack2, proceed to step 2; otherwise, insert XP Service Pack2 (SP2) in the DVD drive and restart Computer to install SP2. The installation will require some features such as USB 2.0 driver from SP2
2. Reboot as required into XP operating system. Ignore all the “Found New Hardware Wizard” for the moment by pressing Cancel if such Windows appear.
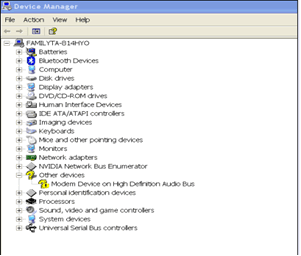
3. After having completed the booting, bring up Device Manager from Control/System/Hardware/Device Manager. One should find quite a few question marks as shown indicating that these are devices that do not have the correct drivers
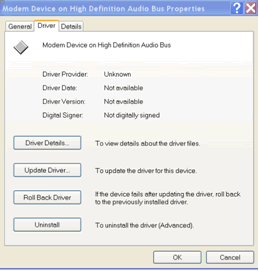
4. Doubleclick the question mark to bring up the following window
5. Select Update Driver to bring up the following screen
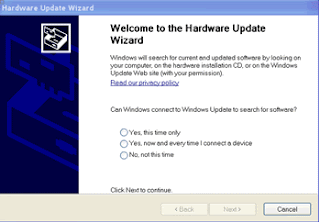
6. Select "No, not this time "etc to bring the following screen finally
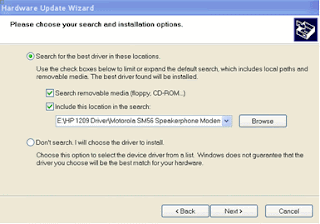
7. Browse and select the correct folder that stores the driver. Follow installation instruction and repeat the same for other drivers.
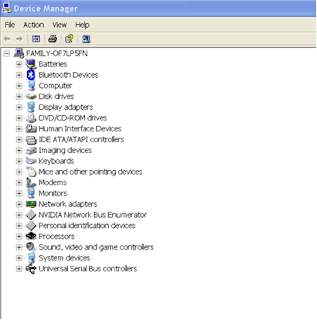
8. If all the drivers have been installed properly, one should see the following picture of the Device Manager page without any yellow question mark; if not, try to resolve the driver problem; otherwise, some devices might not work properly.
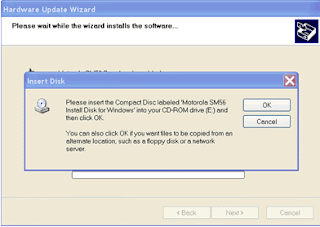
Note: At times, the following screen may appear when Windows cannot locate the Directory automatically. Just close the Insert Disk window by clicking OK and direct Windows to the correct Directory again.
Disclaimer: Efforts have been made to present the author's experience in correct details. Users are advised to do further research and checks by themselves. The author is not responsible for any damage (which should not have happened) as a result of any use of information contained in this blog.


This blog rocks. Simply put one of the most amazing pieces of information out there today. An extremely fine job done here. I was missing over a dozen drivers (SM Bus Controller, Sound, Coprocessor, other, etc) and through the aid of the two files I was able to completely wipe out all components in device manager. Thanks again for this area. My hat goes off to you and your wonderful work.
ReplyDelete