1. Eject the DVD, restart computer (or just hit the reset button) and boot from the Windows XP CD;
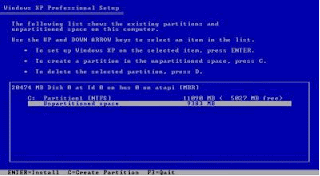
2. When the Windows XP setup reaches the following screen, one should see the unpartitioned space created earlier; also, one should see the partition with Vista in it.
 Note: On occasion that one does not see any of above screen and also XP said it could not detect any hard drive, it is likely that one would need to install the SATA drivers. If one has a bootable floppy drive, hit F6 when prompted to install "3rd party SCSI / RAID (& SATA)"; if not, one would have to slipstream the SATA driver into the XP installation disk. TX1209 does not require installation of SATA driver.
3. Select the Unpartitioned space, then press “C” to create a partition (if prompted, choose NTFS as the file system.)
4. Continue with the rest of the installation as per normal instruction;
5. Windows will thereafter reboot into XP operation system. This is because the boot sector in C: has been re-written to boot up XP instead of Vista operating system;
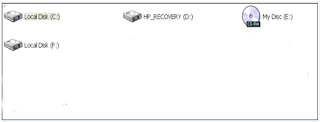
6. When XP reloads and completes its installation, one should see a C: for Vista operating system, D: or E: for HP_Recovery and a new disk D: or F: for XP operating system.

6. Proceed to install the XP SP2. The tablet might require some of the new Windows drivers to complete its driver installation;e.g. USB 2.0 driver
Disclaimer: Efforts have been made to present the author's experience in correct details. Users are advised to do further research and checks by themselves. The author is not responsible for any damage (which should not have happened) as a result of any use of information contained in this blog.


No comments:
Post a Comment